In Optical Aids for Drawing: Take It or Leave It!, I installed my new NeoLucida XL optical tool on the desk and shown how it could be used for tracing the contours of a 3D object. I faced some difficulties when looking through the eyepiece and trying to trace the projection of a 3D object on white paper, so I took dark paper and that turned out to work well.
In this post, I’m reporting further on the results of the next drawing challenge with the NeoLucida XL, which is about tracing a drawing, i.e. a 2D picture instead of a 3D object. In the beginning, I attached my optical tool the same way as it was shown in the previous post, where the tool was positioned in the direction of the window. The same problem reappeared and was related to the light and visibility of the drawing subject (note if the subject is too dark or drawing paper is too bright, the subject is not sufficiently visible through the tool’s eyepiece). I had to change the direction of my entire drawing settings!
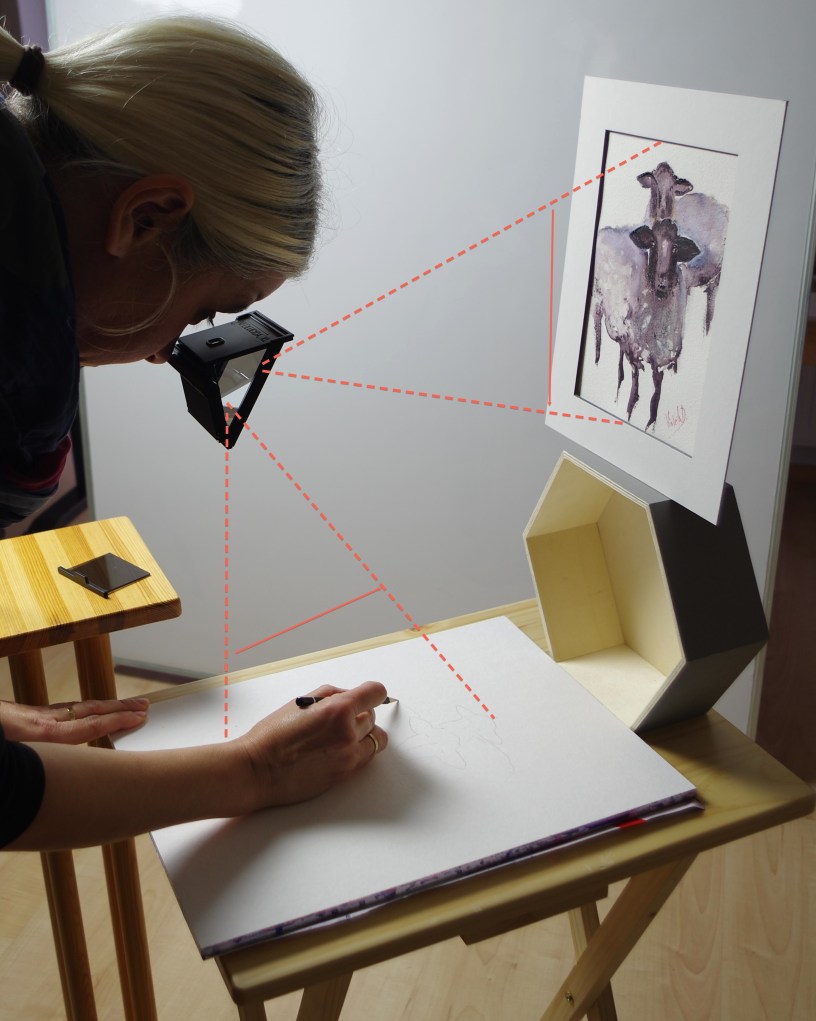
After trying out different settings, I finally found what suits me best, as shown in the photos below. Note the big white panel that has been introduced here to stop the daylight that comes directly from the window. I could have used the window shades too, but it just looked better with the panel 😉 The bright light on the left is one of my daylight lamps that I’m using for taking photographs of artwork and has been specifically introduced here to balance indoor and window light.

As shown in photos, NeoLucida XL is attached to a small mobile table, while my sketch book and the drawing subject are put on another table. I wanted to have these things separated in order to have more flexibility when searching for the proper light for the drawing subject and paper, and when adjusting the distance between the eyepiece of the tool and the subject. The photo on the right, below, is edited by adding red dashed lines showing the way the subject reflects on my sketch book.


Finally, for the sake of demonstrating the sketching process with the tool, I posted the following 50-sec-video on YouTube, that captures only the process of tracing the subject (a painting).
Tracing drawings with NeoLucida XL turned to be simple and fast. The trickiest part is to set up appropriate drawing settings for using the tool, but with practice it will get easier. One of my recommendation would be to keep the drawing subject, camera and sketch book on separate tables that can be easily moved around, while searching for the best settings.
Links:
@neolucida (Twitter)

Thank you for this post. Very helpful!
LikeLike
You’re so welcome, Sandra. I’m very glad that this post is helpful to you!
LikeLike